The Green Brush Part 1: Introduction

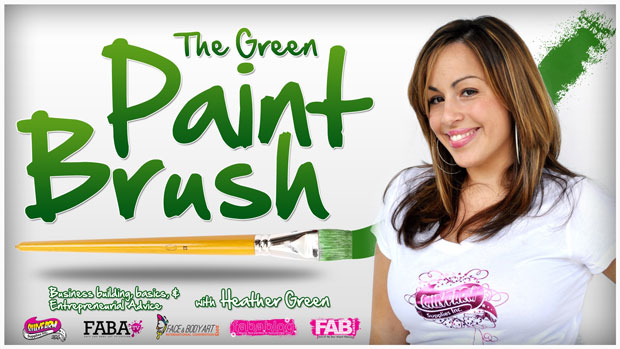
The Green Paint Brush with Heather Green

This is the first installment in The Green Brush, a Marketing and Business tips and tricks series by Heather Green. sponsored by Silly Farm Supplies.

Why

I have spent the past six years making youtube videos on face painting to help you to become better painters, but I totally neglected that being the best painter isn’t good enough. It’s like living on McDonald’s, but then working out every day of the week. You have to combine business skills with talent in order to achieve a winning combination…. So I am dedicating one video blog a month to helping you improve your business, grow your business, and answer your questions.

What

What makes me qualified to be in a position to give advice? For those of you that don’t know me… My name is Heather Green and I am the owner of Silly Farm Supplies, the creator of FABAtv, the co-producer of the FABAIC, publisher of the FABA Blog, a business partner for My FAB Events, a mom, a friend, a face & body painter, and the First Lady of Greater St Mark Ame church. I have been painting for 15 years, have grown my companies into something I am very proud of. I spend much of my time researching, reading, and investing in learning how to be a successful entrepreneur. My goal is to condense my findings into useful information and business advice that you can use and make money from. I feel my face painting Youtubes and teaching style have been so well received because I take a lot of concepts from all the classes I have taken and simplify it to make it attainable for all levels of painters. I want to do that in the business sense too.

Who

My business video blogs are meant to help anyone, not just painters, but all entrepreneurs and aspiring entrepreneurs. I know that watching my face can be boring, but hopefully the content will make it all worth it.

When

My goal is to publish video blogs at least once a month. If you like them I will try my hardest to post 2 a month.

So what’s on the agenda for today?

Getting Started

In order to get ourselves in the business frame of mind there are a few things you need to do to get started on the right path.

Start with time management…. There is a direct correlation between time spent/ invested and success. When I bought silly farm almost 9 years ago I told myself I wouldn’t take a paycheck until we were out of the red. I face painted on the weekends and used that money to live. I didn’t mind working 19 hours a day, and I believe that my time spent obsessing, building, growing Silly Farm is the reason we have grown from 2 employees to 27 employees. If you are only spending two hours a week improving your company, investing in yourself as an artist, or your phones aren’t ringing like you would like then it’s time to take a look at how you are spending your time. I wrote the book on No Time. I get up at 5:00 am, go to the gym, get home to get my son ready for school, go to work, go home, feed him, bathe him, and then go back to work. Now my life style isn’t for everyone, but if you don’t make the time, you can’t expect the results.

Start by dedicating one hour a day to yourself and your business. Spend an hour emailing customers, or taking a class on FABAtv, or seeking new leads. If you invest an hour each day it’s easier to increase the time you spend on your business daily without feeling overwhelmed.

Setting Goals

How many times have you said to yourself I just want to loose 10 lbs or 20lbs? How many times have you said tomorrow I am going to eat better and start laying weight? For better or worse, goals are a huge part of the human psyche. Goals are important because they help create vision and focus. Set, type, and print your goals, make them visible at all times so that you don’t loose sight of what you are working towards. When I launched fabatv I printed a paper out that said 1,000 subscribers … Ready set go! Every morning I looked at my goal and within 9 months I reached my goal. I wish I could say the same about these last 8 baby pounds, but I won’t be too critical. If you make a goal to book five new parties a month, or a goal to save 30% of all your take home, then you keep it where your mind continuously views it. Then you will train yourself to keep the pot at the end of the rainbow in mind. Don’t let your goals become out of sight and out of mind.

Invest in Yourself and Your Business

We learn from others and feedback is essential! Please like and share this post if it helped you. Leave a comment below or send me an email if you have any questions! Who knows, maybe your question will be on the next video!

The Green Brush Part 2: Marketing Mindframe

The Green Paint Brush with Heather Green
This is the second installment in The Green Brush series sponsored by Silly Farm Supplies. Marketing and Business tips and tricks by Heather Green. Heather is the CEO and Owner of Silly Farm Supplies, an international supplies shop for face and body art. Heather is also the co-producer for the Face and Body Art International Convention.

In this segment of The Green Brush I will show you how to get into the Marketing Mind frame.

I breakdown the FREE steps to marketing your business and introduce the 4 P’s which I will explain in detail in future segments.

Marketing & Sales GraphMarketing and Sales are not synonymous, they compliment each other,. You don’t have to fear marketing your business. Marketing is relationship building. Marketing is taking the time to get to know how you can best service your clients. I will guide you on how to achieve effective marketing campaigns.

I urge you to choose a soundtrack that gets you motivated; to get in a working mode and pursue new business avenues.

I also explain sources of free marketing including grass roots campaigns and getting yourself organized to be able to effectively follow up leads. I have created a “Follow Up Form” for you to download and use free of charge. My goal with this form is to help you keep better records, so that you can keep in touch with your customers and build better relationships.

[button type=”ambitious_button” url=”http://www.fabablog.com/wp-content/uploads/forms/event-followup-form.xlsx” target=”” ]Download Follow Up Form(Excel Format)[/button]

I am focused on helping you create and build a business you are proud of. I hope you enjoy this segment of The Green Brush and I encourage you to share your ideas, stories and business successes. Please leave me a comment with your ideas or questions and don’t forget to like and share this article with your friends!

Spiderman for Girls: Face Painting Tutorial

A few weeks ago we had a special guest come visit from Chicago. Chantal of Fanciful Faces stopped in to Silly Farm and guest starred in a YouTube tutorial for us!

Chantal will show us one of her popular festival faces, a spiderman face painting design for girls! This Spidey Girl is a quick and easy to create and girls love it! Want to paint it on a boy? Just switch the colors up! Instead of pink and purple, you can do red and blue!

For more tutorials by Chantal, check out her YouTube!

Cupcake Cutie: Face Painting Tutorial

Can’t see the video? Watch Cupcake Cutie on YouTube!

This birthday will be one they won’t forget. Face paint can go a long way in making a child’s birthday a memorable one.

2 Minute Spiderman for Young Kids | Face Painting Tutorial

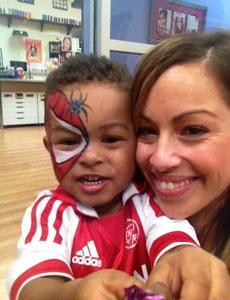
By now you should know that face painting younger kids can be a challenge. My son is almost 3 years old and still wiggles and squirms when I paint him. I was able to sit him down in the Silly Farm showroom and use him for a quick tutorial on face painting little kids a quick and easy Spiderman.

  1. I started using Wolfe White and outlined the eyes. We don’t want to fill over the eyes since he is a younger child and many children are not comfortable with objects near their eyes.
  2. Next, using a filbert brush we are going to fill in the rest of the shape using FAB Makeup Rage.
  3. Pink Power Stencils are very useful for those children that don’t want to sit still! Using a sponge and black face paint, we are going to sponge on the spider using the pink power stencil.
  4. Using a Gold Grip #3 Round Brush and Wolfe Black we are going to finish the details to the mask by outlining and connecting the lines to form a spider-web look.
  5. Last, but not least, we always want to add some glitter and in this case it is the Mama Clown Glitter Black Potion.

London's SpidermanVoila! A quick two minute Spiderman face painting design for younger children!
Don’t forget to check out the rest of my face painting tutorials and head over to Silly Farm Supplies for products! Subscribe to me on YouTube for more!
Happy Painting!

Wild Style Floral Mask – Face Painting Design

Here’s a graffiti inspired floral mask design by Silly Heather. Starting this face painting design off with a Silly Farm sponge, we start the base using a Hippie Rainbow Cake. Next we take our Wildflower Fairyfly Kit and a 3/4″ Flat Brush to create the floral design. Wolfe Black is used for the graffiti effects and outlines. The brush preferred is a Gold Grip #4 Round. Glitter makes everything better, especially the Magic Magenta Glitter.

Can’t see the video? Watch “Wild Style Floral Mask” on YouTube!

Heads Up! Practice Tools Review

Do your volunteer faces keep disappearing when you take your face painting kit out? Maybe your kids now run away instead of towards you when you break out your kit. Sometimes finding a face to paint can be a challenge. Well, we’re going to change that.

Practice heads are a easy and affordable way to practice your face painting and increase your skill set without needing any volunteers or trying to get that squirming child to sit still while you paint. Silly Heather breaks down the difference between each type of practice head in this video review. She will show you proper care and cleaning methods for each practice head as well.

Mehron and ProFace are recognized names that both carry their own type of practice tools. Watch the video to learn more and choose the best practice head to suit you!

Can’t see the video? Watch “Heads Up: Face Painting Practice Tools” on YouTube!

Bonus video! Thanks to Ayanna for this video!

Colorful Snow Leopard : Video Tutorial

Colorful Snow Leopard This fantastic feline design is quick and easy to pull off! Watch the video below for my tutorial on this leopard face painting. So what are you waiting for? Grab your Rainbow Cakes, a Bam stencil, and you’re already half way finished! This design is perfect for little girls, and just change the color scheme up and it fits boys was well!

Products Used

  • Moondance Rainbow CakeRainbow cakes are multi-colored containers of paint manufactured by Silly Farm. I started this feline face painting with one of the newer Silly Farm rainbow cakes, Moondance.

  • Pre-Cut Paradise Sponges These pre-cut paradise sponges are made out of high-density foam and are great for applying your arty brush cake or rainbow cake. Sponges are great to pair with stencils as well!

  • Gold Grip #4 Round Brush - at Silly Farm Supplies The Gold Grip brushes are a standard in face painting. These brushes are an excellent investment as the bristles last long and do not wear out as quick as other brands. This Gold Grip #4 Round is one of my favorite brushes.

  • Bad Ass Mini Stencil (BAMS) 1008 Cracks - at Silly Farm Supplies Bad Ass Mini Stencils are amazing stencils for face & body art, created by Andrea O’Donnell of Skincognito Makeup Art Studio & Supply. You can use these stencils for face painting or body art using a sponge, brush, or airbrush. The one I used is BAM 1008.

  • Wolfe Face Art & FX Aquacolor White - face paint at Silly FarmWolfe FX is a staple in the FABA industry. If you haven’t heard of this brand of face paint, I suggest you try some as soon as you can get your hands on it. Wolfe white & black is highly regarded as the best white & black for face painting.

  • Mama Clown White Fairy Dust Glitter Mama Clown’s world famous cosmetic glitter. This polyester glitter is safe for all your face & body art projects. White Fairy Dust just happens to be one of our best sellers.

Sticker Stencils for Face Painting

lea-reverse-star-stencilThe Tattooed Lady is back with some helpful tips & tricks for your next face painting gig! Have you ever arrived to an event only to realize you forgot your face painting stencils? Check out Léa’s unique fix for this dilemma.
Fortunately for Léa, missing her star shaped stencil wasn’t the end of the world. Realizing she had star shaped stickers, she improvised and was able to discover a new use out of those otherwise ordinary stickers.

Applying the sticker to the area where the stencil would have gone, Léa was able to create a negative star design using her new sticker stencil! A negative design is one without paint and where only skin is making up the area of the design.

Incorporating this newly found face painting skill, Léa has put together a tutorial on her reverse stencil technique! Head on over to The Tattooed Lady’s blog to watch the full tutorial and expand your face painting tricks!

[button type=”ambitious_button” url=”http://www.thetattooedlady.ca/blog/reverse-stencil-face-painting-with-stickers” target=”” ]Read more & Watch the Tutorial[/button]

Puff the Lil Dragon – Face Painting Design

Puff the Lil Dragon Video Tutorial
In this quick tutorial I show you my girly spin on the popular dragon design. No longer are dragons just for boys! Girls can have fun with this design too! It’s also parent friendly and super fast when using an Arty Brush Cake and the ‘Flower Brush’. The ‘flower brush’ is our Silly Farm Signature Large Point brush, and it will help you create the fastest, easiest flowers ever!

I used the following products in this face painting tutorial.

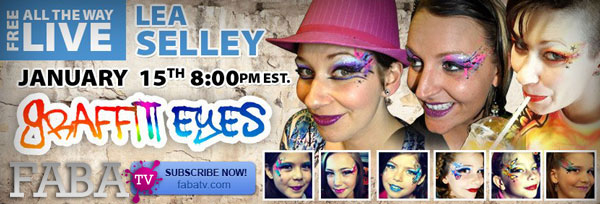
FREE Class on Graffiti Eyes with Léa Selley

Lea Selley on FABAtv LIVE
Lea Selley - JanFABAtv.com is an online face & body art classroom at the palm of your hands. A first in the industry, FABAtv brings one-on-one classroom oriented teaching right to the comfort of your own home. All you need is a high-speed internet connection and a web-enabled device, and you have hundreds of classes on face painting, body painting, airbrush art, and more at your fingertips!

FABAtv premieres a FREE & LIVE class every month. Starting off 2013 with a bang, this month’s LIVE artist is Canadian face painting sensation Léa Selley! You might of seen some of her YouTube videos under her alias, The Tattooed Lady. Below is a sample tutorial of what Léa will be teaching in this upcoming class. Tune in to FABAtv LIVE at 8pm EST on Tuesday, January 15th and catch Graffiti Eyes with Léa Selley, only on FABAtv.com.

You can find Léa Selley on Facebook, or contact her through her website, www.thetattooedlady.ca. Read more about Léa and her class on The Tattooed Lady’s blog.

Graffiti Eye Tutorial

*This is not the LIVE class*

Like the tutorial? Buy the Graffiti Spatter Stencil from Léa and save time face painting!

Free Face Painting Class with Silly Heather

FABAtv Instructor Heather Green

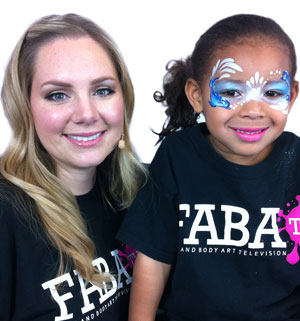
FABAtv (Face and Body Art Television) is feeling the Holiday spirit this winter. If you’re a subscriber to FABAtv, you’ve probably seen the free face painting class they are offering this month. Unlike the usual free & live class that FABAtv hosts around the 15th every month, this is an actual studio-filmed-and-edited class.

Holly Jolly Christmas by Heather Green

The artist behind this free face painting class is Heather Green, aka Silly Heather. Many of you have know of Heather as the owner of Silly Farm Supplies and from her YouTube face painting tutorials. Her latest class is all about Christmas and Holiday designs. You can catch Heather’s free class, Holly Jolly Christmas, on fabatv.com throughout the month of December!

Rudolph Face Painting with Video Tutorial

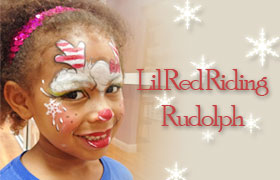
Lil Red Riding RudolphLia face painted as Rudolph

Lia volunteered to be my model for this Lil Red Riding Rudolph, my latest tutorial. This is a Rudolph the red nose reindeer inspired design and it’s a perfect face painting design for boys or girls around the Holidays. I will show you how to create this design step-by-step in my video tutorial below.

Products Used

Happy Hippie Face Painting Video Tutorial

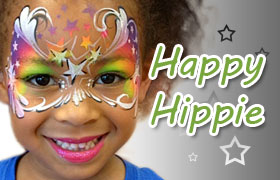
Happy Hippie Face Painting Tutorial
I hope everyone had an amazing Thanksgiving this weekend, however you spent it( with or without family and friends). For those that worked Black Friday and Small Business Saturday, I hope you’re getting some well deserved rest. I wasn’t able to push this tutorial out before Thanksgiving, but I’m here now and delivering it today.

This is Heather’s latest face painting tutorial, aptly named ‘Happy Hippie’ for it’s free flowing nature. This is a quick 3-5 minute design that pops without spending too much time on detail.

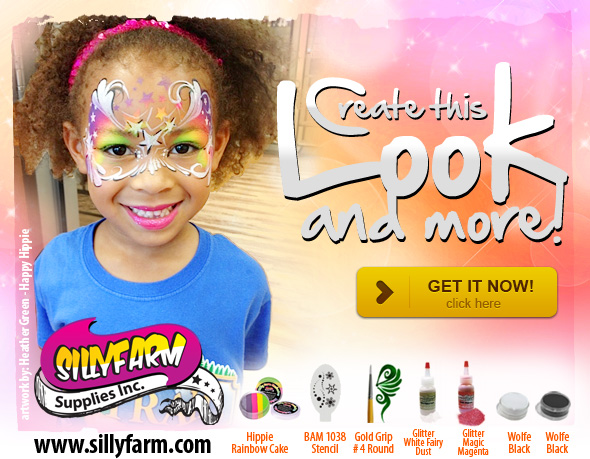
Heather started this design with the brand new, Silly Farm Exclusive Hippie Rainbow Cake. Using a sponge and the BAM 1038 stencil, she started the base on the forehead and then filled around the eyes with just the sponge.

Next, Heather used an Athena #10 Filbert brush and Wolfe White to hand paint a couple more stars and add some strokes above and below the eyes.

Heather then dabbed her sponge in Wolfe White and using the BAM 1038 stencil again, dabs some stars over the Rainbow Cake base on each side.

Next, Heather takes her Gold Grip #4 round brush loaded with Wolfe White and adds some more details around the design.

Depending if you have the time or not, Heather used a Gold Grip #2 brush loaded with Wolfe Black to outline parts of the design.

Finally, Heather added some ‘lipstick’ and some Magic Magenta & White Fairy Dust glitter for the finished design.

The tutorial is below, along with the products used. You can visit Silly Farm’s Create This Look section to see all the products used in each design.

[button type=”button_solid_light” url=”http://www.sillyfarm.com/store/index.php?p=catalog&parent=975&pg=1″ target=”on” ]I want to Create This Look[/button]

Happy Hippie: Create This Look

Thanksgiving Turkey Face Painting

FABAtv Instructor Lisa Joy Young
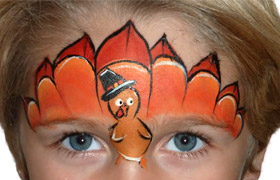
Thanksgiving Turkey Face PaintHalloween has passed and Thanksgiving is upon us. I haven’t really seen many Thanksgiving themed face painting designs, so I thought I would share one. This creative turkey how-to was painted by Lisa Joy Young, and she has a bunch more face painting tutorials up on her YouTube channel. Lisa is also a FABAtv instructor and has a couple online classes for you to expand your brush. If you haven’t experienced FABAtv, tune in on November 14th for a free LIVE body painting class with master artist, Mark Reid.

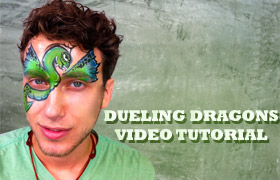
‘Dueling Dragons’ Face Painting Tutorial

Dueling Dragons Video TutorialThis is a design I did earlier in the year using the Silly Farm exclusive Fairy Fly kits. Fairy Fly kits are one of the newest additions to the Silly Farm multi-colored cake collection.

I created this dragon design on Andrew with a minimum amount of products. Below are the products I used, along with a link to the products on Silly Farm.

  1. Dueling Dragons Fairy Fly Kit
  2. Gold Grip Round #3 Brush
  3. Kryolan Flat #12 Brush
  4. Pink Silly Farm Sponges

Witch Hat – Face Painting Tutorial

Face Painter Lisa Joy YoungWe’re sure some of you will recognize this tutorial. Lisa Joy Young’s youtube has quickly spread through-out the face painting world as one of the go-to channels for design ideas and tutorials. If you can’t get enough of Lisa from her Youtube tutorials, don’t forget that she is a FABAtv Instructor and has two classes out and more on the way!

Here’s one of her latest tutorials, a witch hat with spider webs in the background. This is a great design that can be used on kids or adults for your next Halloween gig!


Lisa Joy Young on FABAtv

Autumn Eyes – Face Painting Tutorial

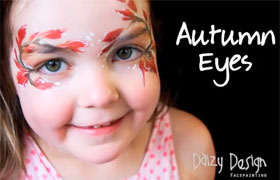
Autumn Eyes - Post ThumbnailThis tutorial caught our eyes here at Silly Farm. Our New Zealand fans might recognize some of the work from Daizy Design. This appropriately named design, Autumn Eyes, comes at the right time for everyone in the norther hemisphere. Halloween is around the corner and Thanksgiving will soon be following. Time to practice those fall designs!

[clear]
Did I mention that the painter responsible for this tutorial, Christy, is a new FaBAIC 2013 instructor?

Christy, AKA Daizy, has been making tutorials on the reg. You can check out her youtube for more face painting tutorials, and give her facebook page a like while you’re at it.

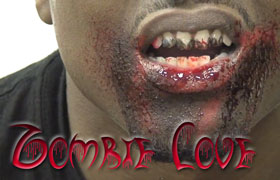
Zombie Love – Special Effects Tutorial

Zombie Love - Special Effects Tutorial
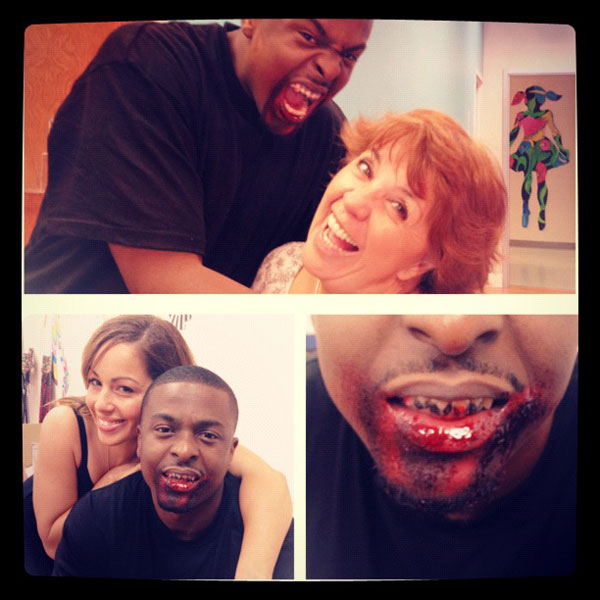
Keeping in theme with the month, here’s another Halloween inspired design. This is a quick, 2-3 minute zombie teeth design using Mehron Tooth FX, Wolfe Face Art & FX’s black & red, a stipple sponge, and some fake blood. My model today is my hubby, Henry! This is a great technique to pair with another design, as it compliments the character and brings it to life even more. Check out my last zombie tutorial you can use this with!
[clear]

  1. Clean the zombie, werewolf, or whatever fanged horror monster’s teeth and make sure they are dry. Make sure their lips don’t touch the Tooth FX for at least 20 seconds once applied.
  2. Apply the mehron tooth fx on their teeth. Remember you are blacking out the teeth to create a sharp, fanged tooth appearance.
  3. Next, apply some wolfe red and black to give a stained blood appearance.
  4. I finished this quick design using a stipple sponge and dabbing some fake, stage blood around the lips, chin, and even on the teeth for some fresh looking blood effects.

It looks like our zombie just had his first bite!
Share with us your creations that you used this technique with. We’d love to see your pictures! Post them to our facebook page or send us a tweet!

Henry's Zombie Teeth

Zombie Skin Special Effect Tutorial

Silly Farm Zombie

[clear]
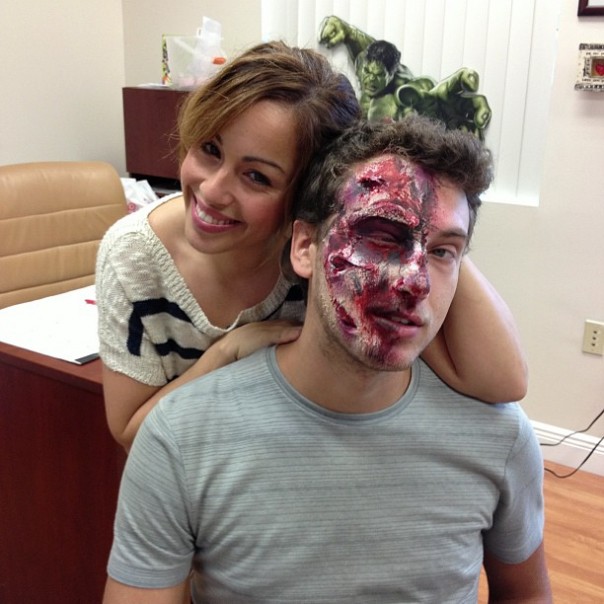
The Halloween season is upon us and many gore filled nights lay ahead of us face and body artists! This gory zombie design is perfect for teens and adults that want to be transformed into the living dead for a night of fun.

I started with tearing my tissue/toilet paper into smaller pieces and applying them to the face using Spirit Gum. The spirit gum dries relatively quick. Right after that, I used the zombie skin and brushed in around the edges of the tissues, where the skin was still showing. Don’t just coat it nice and smooth, give it some texture! After the zombie skin dried, I took my FAB makeup and applied black to the eye socket then used my plum(burgundy) paints to give it a bruised look. I applied more color, judging where to apply it based on how the skin should look when it’s torn or bruised. I applied my Mehron 3D Blood Gel in areas that I wanted the blood to pop more or to look like it’s dripping. Finally I used my stipple sponge with my stage blood to give the final effects of bruised and scraped skin oozing blood.

Dark Bat – Face Painting Video Tutorial

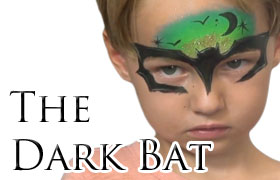
The Dark Bat Face Painting
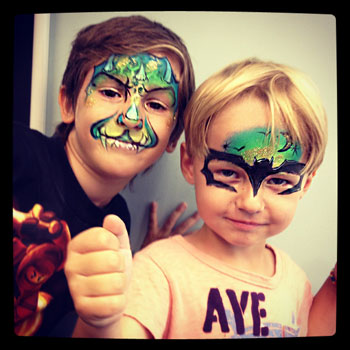
Everyone always asks for more boy designs, so we’re dedicated October to boy designs! This is a quick batman inspired face painting mask that I created and can be done in a quick 3-5 minutes. Add your own variations or copy it line to line!

The model requested that I didn’t paint over his eyes so I created the mask around his eyes without making him close his eyes during the process.
[clear]

  • I start off laying down background color with my rainbow cake, and then painted the mask on top and around his eyes.
  • I added the details, some tiny bats and a moon.
  • I finished the design off with a little glitter and VOILA! A fast and simple design geared towards all ages!

Dark Bat & DragontalesWatch the Dark Bat tutorial on Youtube.
Want the tutorial for this other design? Find out how to create the ‘Dragontales’ design!

‘DragonTales’ Face Painting Video Tutorial

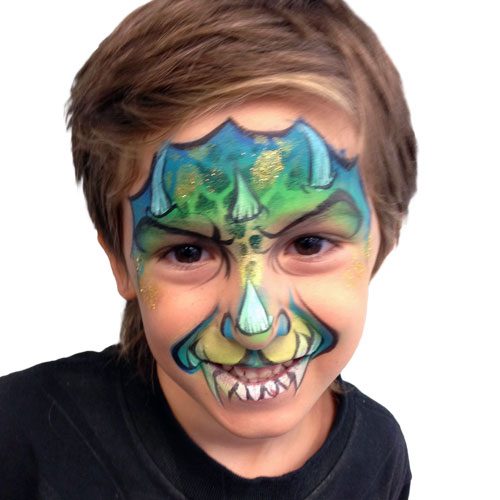
Dragontales Face Painting TutorialEveryone has been asking for more face painting designs you can use on boys. This is a cute, dinosaur inspired design that is sure to please the boys. This design can be done within 3-5 minutes and is perfect for when the boys want something mean and green!

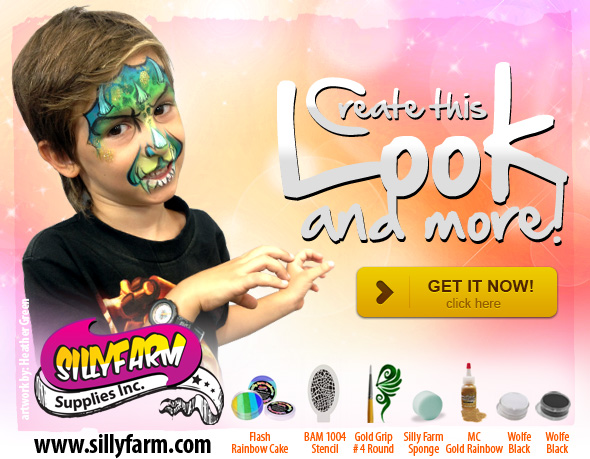
Create this Look!
[clear]

I started by sponging on my base coat using my Flash Rainbow Cake, available at Silly Farm Supplies. Some quick edge work with a brush while still using my Flash Rainbow Cake allowed me to detail the forehead more and add my dinosaur shape. Next I used my BAM Stencil #1004 for some quick detail, and then I started to outline the teeth and horns in white using a Gold Grip #4. I added some depth by bringing out the eyebrows more and was able to quickly add more depth by outlining the design with Wolfe Black. I’ll add some gold on my sponge and use my Bam Stencil again to place some spots. Of course I always need glitter, so I’ll use my finger and dab some Mama Clown Rainbow Glitter on. Ta-da!

Create this Look - Dragontales Face Painting

Face Painting Video Tutorial – My Sunshine

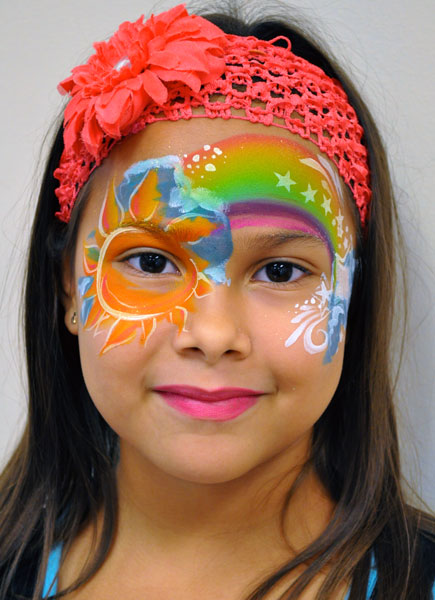
My Sunshine Face PaintingHere’s new video tutorial to start off the week!
This is a colorful design I created that incorporates the sun, clouds, a rainbow, and stars! Practice those teardrop techniques for this design!
Watch the video tutorial and follow up with the products used to create your very own Sunshine! Everything is listed below!


Products Used:

Products available from Silly Farm Supplies

Wofle FX Neon PinkMC Glitter White Fairy DustOne Stroke 1" in. Flat BrushFlash Paradise Prisma CakeFAB Makeup Ziva Blue ShimmerFAB Makeup Bright YellowFAB Makeup Bright Orange

Floral Shimmer Mask: Face Painting Video Tutorial

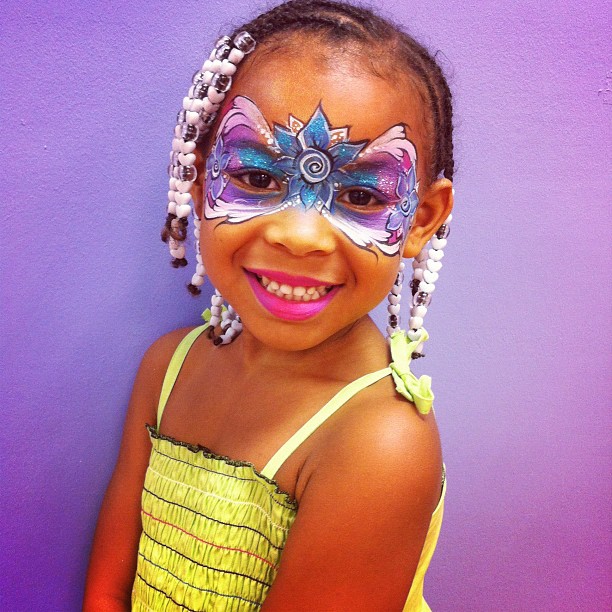
My latest face painting video tutorial! This is a floral mask design that I can put together in under 5 minutes(3 on a good day), but the video is longer because I am going to walk you guys through it. Check out the video below, and don’t forget to like and share it! Leave a comment and tell me what kind of tutorials and designs you would like to see next!

Liamari Floral Shimmer Mask